Stamped Ink Tans Pattern: A Practical Guide for Junk Journaling and Scrapbooking
For enthusiasts of junk journaling and mixed-media scrapbooking, the visual texture of a page often dictates the success of a layout. Among the various aesthetic choices available, the Stamped Ink Tans Pattern has emerged as a distinct preference for creators seeking a vintage, archival look without the mess of physical inks. This style mimics the appearance of hand-stamped designs using sepia, coffee, or antique brown tones, offering an immediate sense of history and warmth to decorative papers. Unlike bright, modern digital prints, these patterns are designed to blend seamlessly with aged ephemera, handwritten notes, and natural fibers.
When evaluating resources for your next project, understanding the specific characteristics of this pattern type is essential. The Stamped Ink Tans Pattern is not merely a color choice; it is a stylistic approach that replicates the imperfections and organic feel of traditional stamping. This article explores how these printable files compare to other options, the technical considerations for achieving high-quality results at home versus professional shops, and how to determine if this specific aesthetic aligns with your creative goals.
Defining the Aesthetic and Distinct Qualities
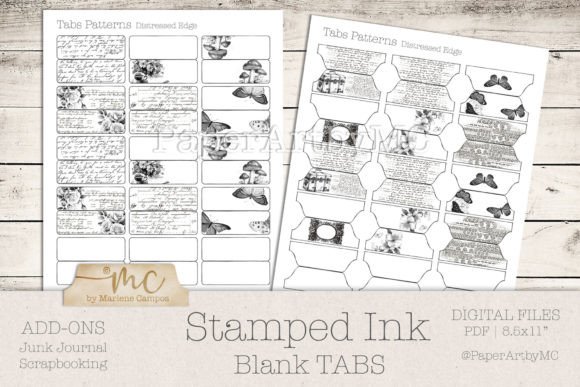
The core appeal of the Stamped Ink Tans Pattern lies in its ability to simulate depth and age. Physically stamping paper with ink pads can be time-consuming and inconsistent; one stamp may be too dry, while another blobs. Digital files designed with this pattern solve that inconsistency by providing a uniform yet organic look across multiple sheets. Typically, these files come in high-resolution PDF formats, ready to be printed on standard 8.5×11″ paper.
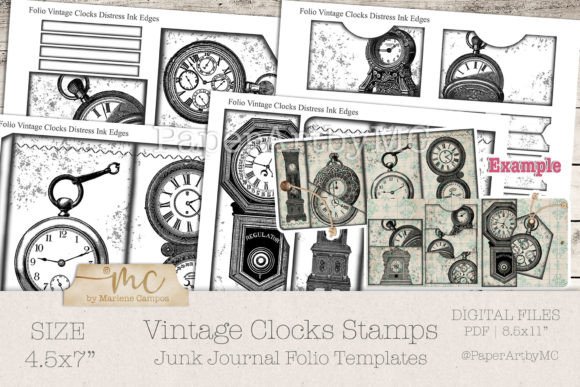
What makes this pattern distinct from generic background papers is the intentional variation in tone. A flat tan background can look artificial, but a pattern that incorporates "stamped" elements—such as floral motifs, script overlays, or geometric borders in varying shades of brown—creates visual interest. These designs are specifically curated for printable ephemera, meaning they are scaled and positioned to be cut out by hand and layered into journals. The "tans" spectrum ranges from light cream to deep espresso, allowing for subtle layering where darker elements pop against lighter backgrounds, mimicking the effect of real ink saturation.
Comparing Digital Prints to Traditional Stamping and Pre-Made Papers
When deciding on materials for a junk journal, creators generally face three primary paths: buying pre-made vintage paper packs, physically stamping their own paper, or utilizing printable digital kits like the Stamped Ink Tans Pattern. Each approach has unique tradeoffs regarding cost, time, and customization.
Pre-made Vintage Paper Packs: These offer convenience and often feature high-quality, textured stock. However, they are typically the most expensive option per sheet. Furthermore, you are limited to the specific designs included in the pack. If you need a specific motif repeated across ten pages, you may run out of matching paper quickly.
Physical Stamping: This method offers the highest degree of tactile authenticity. The raised texture of the ink and the slight variations in pressure are impossible to replicate perfectly digitally. However, it requires a significant investment in tools (stamps, ink pads, acrylic blocks) and consumables. It is also labor-intensive; covering twenty sheets of paper with a complex pattern could take hours.
Printable Digital Kits: This is where the Stamped Ink Tans Pattern shines. It strikes a balance between the authenticity of the vintage look and the efficiency of digital production. With a single purchase, you receive files that can be printed indefinitely. This is ideal for projects requiring consistency, such as creating a set of matching tabs or a series of journal cards. The primary limitation is the lack of physical embossing; the ink sits flat on the page unless you use specific techniques to add texture later. For most junk journalers, however, the visual fidelity of high-resolution prints is sufficient to achieve the desired effect.
Technical Considerations: Paper Weight and Printer Settings
The quality of the final output when using Stamped Ink Tans Pattern files depends heavily on the medium and the machine used. While the digital file provides the design, the physical execution determines whether the result looks professional or amateurish.
Selecting the Right Paper Stock
Paper weight is a critical factor often overlooked by beginners. Standard copy paper (typically 75–90 gsm) is usually too thin for junk journaling. It curls easily when glue is applied and lacks the durability needed for frequent handling. For the best results with tan ink patterns, which rely on subtle contrast, a heavier stock is required.
- 120 gsm (Opaline): This is a functional minimum. It handles light gluing well and is easy to cut by hand. However, it may show through if there is heavy content on the reverse side.
- 160–180 gsm: This is the recommended range for high-quality ephemera. Papers in this weight class feel substantial, resist warping under wet media, and provide a smoother surface for the ink to sit on, enhancing the clarity of the tan patterns.
- Texture: While smooth paper yields the sharpest print, a slightly textured cardstock can enhance the vintage illusion, making the digital print appear more like an old document.
Printer Capabilities and Settings
Not all printers render brown and sepia tones equally. Consumer-grade inkjet printers, such as those from HP or Canon, are generally capable of producing excellent results, but settings must be adjusted. Laser printers can sometimes struggle with subtle gradients in tan colors, potentially resulting in banding or a muddy appearance.
To optimize the Stamped Ink Tans Pattern:
- Resolution: Always select the highest quality or "Photo" setting in your printer driver. Even though the source file is high resolution, a low-quality print setting will pixelate the fine details of the stamped effects.
- Paper Type Setting: Match the printer setting to your actual paper. If you are using 180 gsm cardstock, select the "Cardstock" or "Heavy Paper" option. This slows down the feed rate, allowing the ink to dry properly and preventing smearing.
- Color Management: Browns can sometimes print with an unwanted orange or purple cast. It is advisable to run a test proof on standard paper first to check color accuracy before committing to expensive cardstock.
Home Printing vs. Professional Print Shops
A common dilemma for crafters is whether to print digital kits at home or utilize a local copy center. Both options have merit depending on the scale of the project and the equipment available.
Home Printing: This offers immediate gratification and total control. You can print one sheet to test a layout and print more later. It is cost-effective for small batches. However, home printers have limitations regarding paper thickness. Many consumer models cannot handle paper heavier than 200 gsm reliably, and double-sided printing can be tricky, often leading to alignment issues (registration errors) where the front and back designs do not line up perfectly.
Professional Print Shops: For large-scale projects or when using specialized paper stocks, a local print shop is often superior. Professional machines handle heavy cardstock with ease and offer precise double-sided printing. They also utilize commercial-grade color calibration, ensuring that the Stamped Ink Tans Pattern retains its intended warm tones without shifting. The tradeoff is cost and turnaround time; you cannot make instant adjustments, and the price per sheet may be higher than home ink costs, though often offset by the savings in failed prints and wasted materials.
Ideal Use Cases and Limitations
Understanding when to deploy the Stamped Ink Tans Pattern ensures it enhances rather than overwhelms your project. These patterns are ideally suited for:
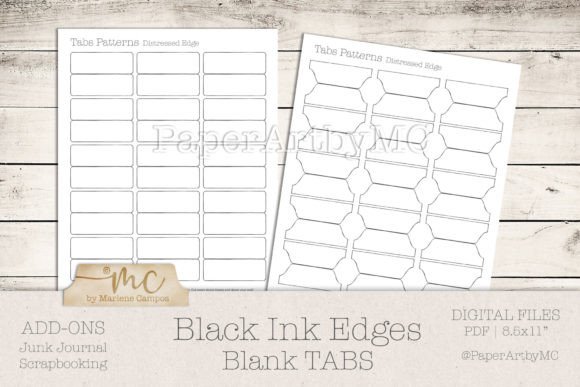
- Journal Tabs and Dividers: The neutral tan palette allows writing to remain legible while adding a decorative edge.
- Background Layers: Because the tones are muted, these papers work exceptionally well as base layers underneath photos, tickets, or bold embellishments.
- Cohesive Collections: When a journal needs a unified theme across dozens of pages, printing multiple sheets of a coordinated pattern ensures visual consistency that is hard to achieve with scavenged vintage papers.
However, there are limitations. If your project relies heavily on bright, neon, or cool-toned accents (blues, greens, pinks), a strictly tan-based palette might create a disjointed look unless intentionally styled for contrast. Additionally, if the tactile experience of raised ink is central to your artistic vision, digital prints alone may feel insufficient, requiring additional steps like heat embossing to mimic the texture.
Making the Decision
Choosing the right resources for your scrapbook or junk journal is a balance of aesthetics, budget, and workflow. The Stamped Ink Tans Pattern offers a compelling solution for those who value the vintage aesthetic but require the flexibility and repeatability of digital files. It eliminates the variability of manual stamping while avoiding the high cost of premium pre-made papers.
Success with these files hinges on attention to detail: selecting the appropriate 160–180 gsm paper, calibrating your printer settings for high-resolution output, and knowing when to outsource to a professional shop for complex double-sided jobs. By understanding these variables, you can effectively integrate these printable ephemera into your creative process, producing professional-looking pages that honor the charm of traditional journaling with the efficiency of modern technology.